Wednesday, July 31, 2013

6 12 Volt audio amplifier

6 - 12 Volt amplifier circuit
The above is an amplifier circuit using supply voltages from 6 volts DC to 12 Volt DC. Power output of the amplifier is quite low with only 1 Watt 8 ohm impedance. You can apply this to the audio signal amplifiers that require strengthening are not so large as in the pocket radio.
Part List :
R1 =  100K
R2 = 39R
R3 = 100R
C1 = 100nF
C2 = 100uF
C3 = 100uF
C4 = 100uF
C5 = 470uF
C6 = 100nF
C7 = 68pF
C8 = 1nF
C9 = 47uF
IC = SFC2790C
Read More..

AC Mains Bistable Switch

This AC mains-operated bistable  switch turns on or turns off a  device using a miniature neon  lamp and a few discrete components.  This switch can be used for control pan-els, appliances and lighting controls.  A push-to-on switch is used to  light up the neon lamp. The light emit-ted by the neon lamp, in turn, enables  the switching action of the circuit. Use  of a 555 timer wired for bistable operation makes the circuit act as a bistable  switch.
Circuit diagram :
AC Mains Bistable Switch-Circuit Diagram
AC Mains Bistable Switch Circuit Diagram
 
The neon lamp (NL1) and the  push-to-on switch (S1) are directly connected to 230V AC mains. The 12V DC  supply for timer 555 (IC1) is derived  from 230V AC mains through capacitive dropper C1, resistor R1 and a 12V  zener diode. IC1 works as a flip-flop  circuit, with the signal at its output  pin 3 toggling every time it receives a  pulse at its pins 2 and 6. 

The operation of the circuit is simple. When you press switch S1 momentarily, the neon lamp glows, making  phototransistor T1 conduct to provide  a pulse at pins 2 and 6 of IC1.  When switch S1 is pressed, the output of IC1  goes high and LED1 glows. Pressing S1  again makes the output of IC1 low and  LED1 stops glowing.

In place of LED1, you can use an  optodiac or suitable relay (not shown  in the circuit) along with a suitable  driver circuit to drive AC loads. Assemble the circuit on a general-purpose PCB with the neon lamp and  the phototransistor housed in a small  black tube isolated from the external  light source, and enclose in a suitable  cabinet. Fix switch S1 on the  front panel of the cabinet,  and mains power cord at  the rear. At the rear, also fix  a 3-pin socket to connect the  AC load. 

Caution.  Take care  when operating this circuit  as it is directly connected to  230V AC mains. Better still,  don’t attempt this circuit  if you have no experience  in handling high-voltage  circuits.
 
 
http://streampowers.blogspot.com/2012/06/ac-mains-bistable-switch.html 
Read More..

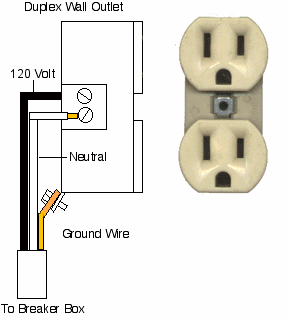
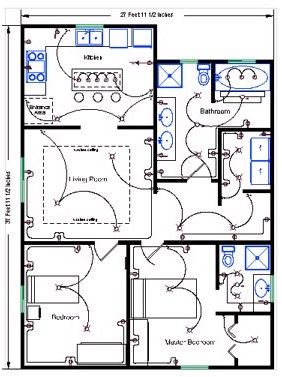
Residential Circuit Diagram Electrical Wiring Information

House Wiring on Keywords House Wiring Diagram Electrical Schematic Wiring A House
Keywords House Wiring Diagram Electrical Schematic Wiring A House.


House Wiring on Telecom Tips   Wiring Your Home For Voip Service   O Reilly Emerging
Telecom Tips Wiring Your Home For Voip Service O Reilly Emerging.


House Wiring on Installing Home Electrical Wiring For Breakers And Fuses Inside A
Installing Home Electrical Wiring For Breakers And Fuses Inside A.


House Wiring on Kitchen Blueprint And Wiring Design Layout
Kitchen Blueprint And Wiring Design Layout.


House Wiring on House Wiring
House Wiring.


House Wiring on Floorplans With Power  Low Voltage And Structured Wiring Symbols
Floorplans With Power Low Voltage And Structured Wiring Symbols.


House Wiring on House And Home Wiring Diagram And Electrical System
House And Home Wiring Diagram And Electrical System.


House Wiring on Have Separate Wiring To Carry Energy Loads To And From The House
Have Separate Wiring To Carry Energy Loads To And From The House.


House Wiring on Residential Circuit Diagram Electrical Wiring Information
Residential Circuit Diagram Electrical Wiring Information.


House Wiring on Outdoor Lighting Wiring Diagram   2 Gang Switch
Outdoor Lighting Wiring Diagram 2 Gang Switch.


Read More..

12V Touch Switch Exciter

This circuit is designed to generate a 20KHz pseudo sine wave signal that can power about 50 remote touch activated switch circuits.  It can support a cable length of about 2500 feet.  A typical remote switch circuit is also shown as well as a receiver circuit for those switches.


Source: DiscoverCircuits
Read More..

LED Volt Meter Circuit

Here is a Simple LED Volt meter to Monitor the charge level in Lead Acid Battery or Tubular battery. The terminal voltage of the battery is indicated through a four level LED indicators. The nominal terminal voltage of a Lead Acid battery is 13.8 volts and that of a Tubular battery is 14.8 volts when fully charged. The LED voltmeter uses four Zener diodes to light the LEDs at the precise breakdown voltage of the Zener diodes. Usually the Zener diode requires 1.6 volts in excess than its prescribed value to reach the breakdown threshold level. When the battery holds 13.6 volts or more, all the Zener breakdown and all LEDs light up. When the battery is discharged below 10.6 volts, all the LEDs remain dark. So depending on the terminal voltage of the battery, LEDs light up one by one or turns off.
Circuit diagram:
LED-Volt-Meter-circuit-diagram12 LED Volt Meter Circuit Diagram
 
 
http://streampowers.blogspot.com/2012/06/led-volt-meter-circuit.html 
Read More..

Tuesday, July 30, 2013

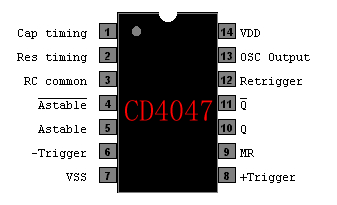
12VDC – 220VAC Inverter Using Cmos CD4047

12VDC – 220VAC Inverter Using Cmos CD4047
This circuit inverter converts 12V DC battery to AC 22oV as the replacement of home energy. The inverter can be used for small electronic devices such as lamps, radio, phone charger, disc player, etc.
12VDC – 220VAC Inverter Using Cmos CD4047
The inverter circuit is a central component, the CMOS 4047, and converts a DC voltage of 12 V to 220 V AC voltage. 4047 is used as an astable multivibrator. The pin 10 and 11 we find a symmetrical rectangular signal is amplified by Darlington transistors T1 and T2 trailer, and finally reaches the secondary coil of a transformer of the network (2 x 10V/100VA). Primary coil voltage is 220 AC voltage terminals. For best performance, use a toroidal core transformer with low losses. P1 to the output frequency can be regulated within certain limits (50 ... 400 Hz).
Read More..

Simple Current to voltage converter circuit Diagram

A filter removes the dc component of the rectified ac, which is then scaled to RMS

 Simple Current-to-voltage converter Circuit  Diagram


    Simple Current-to-voltage converter
Read More..

Wiring Diagram

Electrical Wiring Diagrams on Free Wiring Diagrams   Download Free Wiring Schematics
Free Wiring Diagrams Download Free Wiring Schematics.


Electrical Wiring Diagrams on Series 600 Electric Wiring Diagram   Car Parts And Wiring Diagram
Series 600 Electric Wiring Diagram Car Parts And Wiring Diagram.


Electrical Wiring Diagrams on Wiring Diagram
Wiring Diagram.


Electrical Wiring Diagrams on Automotive Electrical Diagrams Provide Symbols That Represent Circuit
Automotive Electrical Diagrams Provide Symbols That Represent Circuit.


Electrical Wiring Diagrams on Residential Circuit Diagram Electrical Wiring Information
Residential Circuit Diagram Electrical Wiring Information.


Electrical Wiring Diagrams on 1964 Gmc Truck Electrical System Wiring Diagram   Circuit Schematic
1964 Gmc Truck Electrical System Wiring Diagram Circuit Schematic.


Electrical Wiring Diagrams on Honda Goldwing Gl1100 Wiring Diagram And Electrical System Harness
Honda Goldwing Gl1100 Wiring Diagram And Electrical System Harness.


Electrical Wiring Diagrams on Typical 7 Way Trailer Wiring Diagram   Circuit Schematic
Typical 7 Way Trailer Wiring Diagram Circuit Schematic.


Electrical Wiring Diagrams on Standard Electric Water Heater Operation
Standard Electric Water Heater Operation.


Electrical Wiring Diagrams on Three Way Switch Wiring Diagram
Three Way Switch Wiring Diagram.


Read More..

Proximity Detector

This proximity detector is constructed using an infrared diode detector. Infrared detector can be used in various equipment such as burglar alarms, touch free proximity switches for turning on a light, and solenoid-controlled valves for operating a water tap. Briefly, the circuit consists of an infrared transmitter and an infra-red receiver (such as Siemens SFH506-38 used in TV sets).

  The transmitter part consists of two 555 timers (IC1 and IC2) wired in astable mode, as shown in the figure, for driving an infrared LED. A burst output of 38 kHz, modulated at 100 Hz, is required for the infrared detector to sense the trans mission; hence the setup as shown is required.  To save power, the duty cycle of the 38kHz astable multivibrator is maintained at 10 per cent.  The receiver part has an infrared detector comprising IC 555 (IC3), wired for operation in monostable mode, followed by pnp transistor T1. Upon reception of infrared signals, the 555 timer (mono) is turned  ‘on’ and it re-mains  ‘on’ as long as the infrared signals are being received.  
 
Circuit Diagram :
Proximity Detector-Circuit-Diagram
Proximity Detector Circuit Diagram
 
When no more signals are received, the mono goes  ‘off’ after a few seconds (the delay depends on timing resistor-capacitor combination of R7-C5). The de-lay obtained using 470kilo-ohm resistor and 4.7µF capacitor is about 3 seconds. Unlike an ordinary mono, the capacitor in this mono is allowed to charge only when the reception of the signal has stopped, because of the pnp transistor T1 that shorts the charging capacitor as long as the output from IR receiver module is available (active low).  This setup can be used to detect proximity of an object moving by. Both transmitter and receiver can be mounted on a single breadboard/PCB, but care should be taken that infrared receiver is behind the infrared LED, so that the problem due to infrared leak-age is obviated.  

An object moving nearby actually reflects the infrared rays from the infrared LED. As the infrared receiver has a sensitivity angle of 60o, the IR rays are sensed within this lobe and the mono in the receiver section is triggered. This principle can be used to turn ‘on’ the light, using a relay, when a person comes nearby. The same automatically turns  ‘off’ after some time, as the person moves away. The sensitivity depends on the current limiting resistor in series with the infrared LED. It is ob-served that with in circuit resistance of preset VR1 set at 20 ohms, the object at a distance of about 25 cms can be sensed.  This circuit can be used for burglar alarms based on beam interruption, with the added advantage that the transmitter and receiver are housed in the same enclosure, avoiding any wiring problems.


http://www.ecircuitslab.com/2011/12/proximity-detector.html
Read More..

Build a Charger Extends Lead Acid Battery Life Circuit Diagram

The Charger Extends Lead-Acid Battery Life Circuit Diagram furnishes an initial charging voltage of 2.5 V per cell at 25°C to rapidly charge a battery. The charging current decreases as the battery charges, and when the current drops to 180 mA, the charging circuit reduces the output voltage to 2.35 V per cell, floating the battery in a fully charged state. 

This lower voltage prevents the battery from overcharging, which would shorten its life. The LM301A compares the voltage drop across R1 with an 18-mV reference set by R2. The comparator`s output controls the voltage regulator, forcing it to produce the lower float voltage when the battery-chaiging current passing through R1 drops below 180 mA. the 150-mV difference between the charge and float voltages is set by the ratio of R3 to R4. The LEDs show the state of the circuit . 

Charger Extends Lead-Acid Battery Life Circuit Diagram

Charger Extends Lead-Acid Battery Life Circuit Diagram

Read More..

Monday, July 29, 2013

Simple Wide band 2 pole high pass filter

The Simple Wide band 2 pole high-pass filter circuit provides a 10MHz cutoff frequency. Resistor R3 ensures that the input capacitance of the amplifier does not interact with the filter response at the frequency of interest. An equivalent low pass filter is similarly obtained by capacitance and resistance transformation . 

Simple Wide band 2 pole high-pass filter Circuit Diagram

Simple Wide band 2 pole high-pass filter

Read More..

Saturday, July 13, 2013

Power On Indicator

Some types of electronic equipment do  not provide any indication that they are  actually on when they are switched on.  This situation can occur when the back-light of a display is switched off. In addition, the otherwise mandatory mains  power  indicator  is  not  required  with  equipment  that  consumes  less  than  10 watts. As a result, you can easily forget  to switch off such equipment. If you want  to know whether equipment is still drawing power from the mains, or if you want  to have an indication that the equipment  is switched on without having to modify the equipment, this circuit provides a solution. 

image

One way to detect AC power current and  generate a reasonably constant voltage  independent of the load is to connect a  string of diodes wired in reverse parallel in series with one of the AC supply  leads. Here we selected diodes rated  at 6 A that can handle a non-repetitive  peak current of 200 A. The peak current  rating is important in connection with  switch-on  currents.  An  advantage  of  the selected diodes is that their voltage  drop increases at high currents (to 1.2 V  at 6 A). This means that you can roughly  estimate the power consumption from  the brightness of the LED (at very low  power levels). The voltage across the diodes serves as  the supply voltage for the LED driver. To  increase the sensitivity of the circuit, a  cascade circuit (voltage doubler) consisting of C1, D7, D8 and C2 is used to double  the voltage from D1–D6. Another benefit  of this arrangement is that both halve- waves of the AC current are used. We use  Schottky diodes in the cascade circuit to  minimise the voltage losses.
Circuit diagram :
Power On Indicator-Circuit-Diagram
Power On Indicator Circuit Diagram
 
The LED driver is designed to operate the LED  in blinking mode. This increases the amount  of current that can flow though the LED when  it is on, so the brightness is adequate even  with small loads. We chose a duty cycle of pproximately 5 seconds off and 0.5 second  on. If we assume a current of 2 mA for good  brightness with a low-current LED and we can  tolerate a 1-V drop in the supply voltage, the  smoothing capacitor (C2) must have a value of  1000 µF. We use an astable multivibrator built around two transistors to implement a  high-efficiency LED flasher. It is dimensioned to minimise the drive current of  the transistors. The average current consumption is approximately 0.5 mA with a  supply voltage of 3 V (2.7 mA when the  LED is on; 0.2 mA when it is off). C4 and  R4 determine the on time of the LED (0.5  to 0.6 s, depending on the supply volt-age). The LED off time is determined by  C3 and R3 and is slightly less than 5 seconds. The theoretical value is R × C × ln2,  but the actual value differs slightly due to  the low supply voltage and the selected  component values.
 
Diodes D1-D6 do not have to be special  high-voltage diodes; the reverse volt-age is only a couple of volts here due  the reverse-parallel arrangement. This  voltage drop is negligible compared to  the value of the mains voltage. The only  thing you have to pay attention to is the  maximum load. Diodes with a higher  current rating must be used above 1 kW.  In addition, the diodes may require cool-ing at such high power levels.  Measurements on D1–D6 indicate that  the voltage drop across each diode is  approximately 0.4 V at a current of 1 mA.  Our aim was to have the circuit give a  reasonable indication at current levels  of 1 mA and higher, and we succeeded  nicely. However, it is essential to use a  good low-current LED.
 
Caution: the entire circuit is at AC power potential. Never work on the circuit with the mains cable plugged in. The  best enclosure for the circuit is a small,  translucent box with the same colour as  the LED. Use reliable strain reliefs for the  mains cables entering and leaving the  box (connected to a junction box, for  example). The LED insulation does not  meet the requirements of any defined insulation class, so it must be fitted such that it  cannot be touched, which means it cannot  protrude from the enclosure. 


http://www.ecircuitslab.com
Read More..

Electret Mic Booster Circuits Diagram

Anyone who’s spent much time searching the web for interesting circuits is likely to have found at least one TL431 based audio amplifier, the circuit being based on the principle that any comparator can be used in linear mode if it’s rolled off with enough negative feedback. Although the TL431 is often referred to as a programmable or adjustable zener, it is in fact a comparator with it’s own 2.5 V reference all neatly wrapped up in a TO92 package.

The problem with the TL431 amplifiers to be found on the web is that they simply roll it back with large nfb and leave it at that, which results in ver y low gain, to make mat ter s worse some such circuits make a bit of a hash of biasing the control input. 
Electret Mic Booster Circuit Diagram
 
Booster Circuit Diagram

The circuit presented here takes care of the low gain by adding an AC shunt to the feed-back path and using an electret mic for the input the 2.5 V set on the control input at stable operating condition suits an electret mic per fectly. The first prototype had a 35 ohms loudspeaker as a load (RL), this gave good results although the TL431 ran a bit warm with a Vccof 12 V. An old 130 ohm telephone earpiece is likely to present a less stressful load. AC shunt C2 (100 µF) has to be a quality component in terms of its ESR specification don’t just use a scruffy capacitor lying about as you may experience RF sensitivity. It was necessary to add a series resistor (R3; about 100 ohms) or in extreme cases an inductor (L1; 100 – 220 µH).
Components C1 & R1 are entirely optional to selectively feed some unshunted feedback to reduce noise; 1.5 k? & 5.6 nF are as good a place as any to start off with. Initial set-up depends on the current drawn by the electret mic and the value for RL any-where between 200 and 2,000 ohms is good. R2 allows the TL431 cathode to swing despite the AC shunt, 1.2 k? was found to be satisfactory, P1 can be a 47 k? trimpot and is used to set the voltage drop on RL. In the case of moving coil speakers a compromise between volt-age swing and prebiasing the cone should be sought, with a resistive load adjust for 0.5 Vcc, once the operating point is determined P1 can be measured and replaced by an equivalent fixed resistor.

The circuit has a couple of handy features, firstly it wor k s ver y well on the end of a twisted-pair the output can be tapped off at the wiper if RLis a pot at the power supply end, secondly by salvaging the JFET from an old electret mic (some common types of JFET will work but not quite as well), just about any piezo electric element can be used as the transducer. Brass disc sounders give a good output (handy as vibration sensors if glued to a structure); even the quartz discs from clock crystals give some output, a phono crystal cartridge gives a high output and the piezo-ceramic pellet from a flintless cigarette lighter gives a huge output... the range of possible applications is awesome!

A surprising application is the ability to test the microphonic sensitivity of ordinary capacitors! Disc ceramic types don’t need to be tapped very hard to produce an output but rolled metalised foil types produce some out-put too. Link
Read More..

12 V Bidirectional Motor Control Circuit

This simple circuit drives DC motors with a maximum current of 1 A and can be built with readily available components.The output voltage is adjustable between 0 and 14 V and the polarity can be changed so that not only motor speed but also rotation direction can be adjusted by turning a knob. 

The circuit is also ideal as a controller for a DC model railway or small low voltage hobby tool. Power for the circuit is supplied by a 18 V mains transformer rated at 1.5 A. Diodes D1to D4 rectify the supply and capacitor C1 provides smoothing to give a DC output voltage of around 24 V. A classic ‘H’ bridge configuration is made up with transistors T1/T3 and T2/T4. Transistors T5 and T6 together with resistors R7 and R8 provide the current sense and limiting mechanism. The maximum output current limit can be changed from 1 A by using different value resistors for R7 and R8: IOUT = 0.6 V / R where R gives the value for R7 and R8. For increased current limit the mains transformer and diodes will need to be changed to cope with the extra current as well as the four transistors used in the bridge configuration. 

Circuit diagram:
12 V Bidirectional Motor Control Circuit Diagram  12 V Bidirectional Motor Control Circuit Diagram
 
Motor speed control and direction is controlled by a twin-ganged linear pot (P1). The two tracks of P1 together with R1/R2 and R3/R4 form two adjustable potential divider networks. Wiring to the track ends are reversed so that as the pot is turned the output voltage of one potential divider increases while the other decreases and vice versa. 

In the midway position both dividers are at the same voltage so there is no potential difference and the motor is stationary. As the pot is rotated the potential difference across the motor increases and it runs faster. The voltage drop across D5 and D6 is equal to the forward voltage drop VBE of the bridge transistors and ensures that the motor does not oscillate in the off position with the pot at its mid point.


http://www.ecircuitslab.com/2011/07/12-v-bidirectional-motor-control.html
Read More..

LED Matrix Horizontally

LEDs provide a befitting way to electronically display information. whereas the seven-segment LED brandish, organized in the pattern of the digit 8, is common, it does not permit the brandish of some alphanumeric individual features. A 5×7 commanded matrix permits the display of all ASCII individual features, as well as graphics shapes.

The circuit in this conceive concept displays an unconventional way to use a 5×7 LED matrix.You can use a conceive encompassing a set of 5×7 commanded flats without altering any thing in the circuitry, except for the arrangement of the commanded units. 


 Using one 5×7 LED matrix, or N units, horizontally instead of vertically allows the display of two characters, or 2×N characters. The minimum pattern for lowercase and uppercase letters requires only a 3×5 LED configuration, except for the letters M and m, which require at least a 5×5 LED configuration and need a dedicated subroutine.

The circuit in Figure 1 uses an 8-bit, 18-pin PIC micro controller and a decade counter to drive one or two 5×7 LED units to provide a display module of two or four digits. The circuit uses a small pushbutton switch to increment the counter. By default, the circuit works in high-brightness mode. If you press the pushbutton during power-on, the circuit works in low-power mode.
Read More..

Friday, July 12, 2013

Voltage Tester for Model Batteries

With a suitable load, the terminal voltage of a NiCd or lithium-ion battery is proportional to the amount of stored energy. This relationship, which is linear over a wide range, can be used to build a simple battery capacity meter. 

Circuit Image :
 Voltage Tester for Model Batteries Image
Voltage Tester for Model Batteries Circuit Image 

This model battery tester has two functions: it provides a load for the battery, and at the same time it measures the terminal voltage. In addition, both functions can be switched on or off via a model remote-control receiver, to avoid draining the battery when it is not necessary to make a measurement. The load network, which consists of a BC517 Darlington transistor (T2) and load resistor R11 (15 Ω /5 W), is readily evident. When the load is active, the base of T1 lies practically at ground level. Consequently, T1 conducts and allows one of the LEDs to be illuminated. 

Circuit Diagram :
Voltage Tester for Model Batteries-Circuit Diagram
Voltage Tester for Model Batteries Circuit Diagram

The thoroughly familiar voltmeter circuit, which is based on the LM3914 LED driver, determines which LED is lit. The values of R6 and R7 depend on the type and number of cells in the battery. The objective here is not to measure the entire voltage range from 0 V, but rather to display the portion of the range between the fully charged voltage and the fully discharged voltage. Since a total of ten LEDs are used, the display is very precise. For a NiCd battery with four cells, the scale runs from 4.8 V to 5.5 V when R6 = R7 = 2 kΩ. The measurement scale for a lithium-ion battery with two cells ranges from 7.2 V to 8.0 V if R6 = 2 kΩ and R7 = 1 kΩ. 

For remote-control operation, both jumpers should be placed in the upper position (between pin 1 and the middle pin). In this configuration, either a positive or negative signal edge will start the measurement process. A positive edge triggers IC1a, whose output goes High and triggers IC1b. A negative edge has no effect on IC1a, but it triggers IC1b directly. In any case, the load will be activated for the duration of the pulse from monostable IC1b. Use P12 to set the pulse width of IC1a to an adequate value, taking care that it is shorter than the pulse width of IC1b. 

If the voltage tester is fitted into a remote-controlled model, you can replace the jumpers with simple wire bridges. However, if you want to use it for other purposes, such as measuring the amount of charge left in a video camera battery, it is recommended to connect double-throw push-button switches in place of JP1 and JP2. The normally closed contact corresponds to the upper jumper position,while the normally open contact corresponds to the lower position.

Parts :
Resistors:
R1,R2 = 47kΩ
R3 = 100kΩ
R4 = 500kΩ
R5 = 1kΩ
R6,R7 = see text (1% resistors!)
R8 = 1kΩ5
R9 = 1kΩ2
R10 = 330Ω
R11 = 15Ω 5W
R12 = 15kΩ
P1 = 100kΩ preset
Capacitors:
C1 = 10nF
C2 = 100nF
Semiconductors:
D1-D10 = LED, red, high effi-ciency
T1 = BC557
T2 = BC517
IC1 = 74HC123
IC2 = LM3914AN
Miscellaneous:
PC1,PC2,PC3 = solder pin
JP1,JP2 = jumper or pushbutton

PCB Layout :
B. PCB Laout
Voltage Tester for Model Batteries PCB Layout
 
 
Streampowers
Read More..

Very Low Power 32kHz Oscillator

The 32-kHz low-power clock oscillator offers numerous advantages over conventional oscillator circuits based on a CMOS inverter. Such inverter circuits present problems, for example, supply currents fluctuate widely over a 3V to 6V supply range, while current consumption below 250 µA is difficult to attain. Also, operation can be unreliable with wide variations in the supply voltage and the inverter’s input characteristics are subject to wide tolerances and differences among manufacturers. The circuit shown here solves the above problems. Drawing just 13 µA from a 3V supply, it consists of a one-transistor amplifier/oscillator (T1) and a low-power comparator/reference device (IC1).

Circuit diagram:
very-low-power-32khz-oscillator-circuit-diagram Very Low Power 32kHz Oscillator Circuit Diagram

The base of T1 is biased at 1.25 V using R5/R4 and the reference in IC1. T1 may be any small-signal transistor with a decent beta of 100 or so at 5 µA (defined here by R3, fixing the collector voltage at about 1 V below Vcc). The amplifier’s nominal gain is approximately 2 V/V. The quartz crystal combined with load capacitors C1 and C3 forms a feedback path around T1, whose 180 degrees of phase shift causes the oscillation. The bias voltage of 1.25 V for the comparator inside the MAX931 is defined by the reference via R2. The comparator’s input swing is thus accurately centred around the reference voltage.

Operating at 3 V and 32 kHz, IC1 draws just 7 µA. The comparator output can source and sink 40 mA and 5 mA respectively, which is ample for most low-power loads. However, the moderate rise/fall times of 500 ns and 100 ns respectively can cause standard, high-speed CMOS logic to draw higher than usual switching currents. The optional 74HC14 Schmitt trigger shown at the circuit output can handle the comparator’s rise/fall times with only a small penalty in supply current.


Source by : Streampowers
Read More..

Simple 30 Watt VHF Amplifier by using 2SC1946A

The 30 watt amplifier schematic shown below provides an appropriate power boost with an input of 4 watt up to 6 watts. The circuit is designed to cover 88-108MHz FM Broadcast Band. However, the circuit is very stable at my place and provides a clean-output through seven (7) element Butter-worth low-pass filter.

Circuit Diagram:


Notes:
The heart of the circuit is 2SC1946A VHF RF power transistor. The transistor is specifically designed for operation in frequencies up to 175 MHz, with very good results. As you can see, the power line is well decoupled. The amplifier current can be over 5 amps. All the coils are made from 16gauge laminated wire (or Silver copper wire can do best) and the RFC can be of HF toroid core (as shown in the picture) or 6 holes ferrite bead.C3 and R1 forms snubber circuit while R2 and C6 prevent the amplifier from self-oscillation at VHF, sometimes you need to add 180 ohms in parallel with L7.That will cause the amplifier to dissipate UNDESIRABLE VHF thereby reducing spurious level.


The photo below is 60Watts VHF power amplifier using the above circuit. Two of 2SC1946A transistors are arranged at 90 degrees to each other and their outputs are combined using "Power Combiner Network”. It is quite difficult to combine powers at VHF and UHF bands.

However, I recommend that hobbies should stick to single power design due to its complicity and large rate of INTERFERENCE. (in attempt to go for double transistors which involves power combiner network). Since the two amplifiers are operating in different phase (out of phase).

Tuning:
Tuning of the amplifier is not hard at all. You just have to connect the output to a good antenna with a transmission line (RG214) of 50 ohms. First match the output network, and then do the same to the input network for a maximum power output. By way of adjustment, you can increase the output at its operating frequency.
Read More..

8 Channel LPT Relay Board

Specifications:
Channel Relay Board is a simple and convenient way to interface 8 relays for switching application in your project.

  • Input - 12 VDC @ 336 mA
  • Output - eight SPDT relay
  • Relay specification - 5 A @ 230 VAC
  • Trigger level - 2 ~ 5 VDC
  • Berg pins for connecting power and trigger voltage
  • LED on each channel indicates relay status
  • Power Battery Terminal (PBT) for easy relay output and aux power connection
  • Four mounting holes of 3.2 mm each
  • PCB dimensions 169 mm x 72 mm

Schematic:

Parts List:

PCB:


Download this Circuit in PDF
Read More..

Thursday, July 11, 2013

Heat Detector Alarm Using the UM3561

A very simple heat detector alarm electronic project can be designed using the UM3561 sound generator circuit and some other common electronic parts . This heat detector electronic circuit project uses a complementary pair comprising npn and pnp transistor to detect heat . Collector of T1 transistor is connected to the base of the T2 transistor , while the collector of T2 transistor is connected to RL1 relay . T3 and T4 transistors connected in darlington configuration are used to amplify the audio signal from the UM3561 ic .

Heat Detector Alarm Circuit diagram


When the temperature close to the T1 transistor is hot , the resistance to the emitter –collector goes low and it starts conducting . In same time T2 transistor conducts , because its base is connected to the collector of T1 transistor and the RL1 relay energized and switches on the siren which produce a fire engine alarm sound . This electronic circuit project must be powered from a 6 volts DC power supply , but the UM3561 IC is powered using a 3 volt zener diode , because the alarm sound require a 3 volts dc power supply . The relay used in this project must be a 6 volt / 100 ohms relay and the speaker must have a 8 ohms load and 1 watt power .
Read More..

Transistor Water Sensor Alarm

This water sensor alarm circuit diagram is designed using common electronic components. Thewater sensor alarm circuit may operate an active buzzer, to make a sound when is reached a certain level of water.

Transistor Water Sensor Alarm Circuit Diagram


Because water sensor and control circuit for buzzer are located on the same printed circuit board, indicator, together with 9 V battery and buzzer can be mounted in a compact case.

When water reaches the sensor, the base of T1 is connected to the positive supply terminal. Therefore, T1 and T2 are open, so that buzzer BZ1, will be activated. Sensitivity reduction of the circuit can be done by increasing the value of R2.
Read More..

IR Remote Control Extender Mark 4

An Infra Red wired Repeater circuit to control appliances from a remote location.


Parts List:
R1: 1k Resistor (1)
R2: 3.3k Resistor (1)
R3: 10k Resistor (1)
R4: 15k Resistor (1)
R5: 2k2 Resistor (1)
R6: 470R Resistor (1)
R7: 47R Resistor (1) 0.5 Watt
PR1: 4.7k Preset (1)
C1,C3: 47u Elect(2)
C2: 1n Polyester 5% or better (1)
C4: 100u Elect(1)
Z1: 5V1 Zener (1)
Q1: BC549C or BC109C or 2N2222 (1)
Q2: BC337 or BC549 or ZTX450 (1)
IC1 : TSOP1738
IC2: 555 or 7555 (1)
LED1 5mm RED (1)
LED2,3 IR diode TIL38 or similar (2)

Alternatives to IC1 :

Everlight IR receiver module ELIRM 8621
Harrison electronics IR1
Vishay TSOP 1838
Radio Shack 276-0137
Sony SBX 1620-12
Sharp GP1U271R

Notes:
The signal emitted by an IR remote control contains two parts, the control pulses and a modulated carrier wave. The control pulses are used to modulate the carrier, a popular modulation frequency being 36 and 42KHz. The signal is radiated by an IR diode, typical wavelengths in the 850 and 950 nm region of the electromagnetic spectrum. Although this light is invisible to the human eye, it can be seen as a bright spot with a camcorder or digital camera.

In this circuit, the TSOP1738 IR module removes the carrier leaving only the slower control pulses ( 1 - 3KHz) which appear at the output. R1, C1 and Z1 form a smoothed 5 Volt supply for the IR module. Under quiescent conditions (no input signal) the output of the IR module is high. Transistor Q1 will be on, resulting in a low collector voltage, restting the 555 oscillator. Q1 also acts as a level shifter, converting the 5 Volt output signal to 12 Volts for the 555 timer. When an IR signal is received, decoded control pulses turn Q1 off and on. Each time Q1 turns off, pin 4 of the 555 timer goes high and an oscillation will be produced for the duration of each data pulse.

The 555 is wired as an equal mark/space ratio oscillator, the timing resistor R4, being connected back to the output of the timer, pin 3. The timing capacitor C2 is the other component in the timing chain. The pulse duration at pin 3 is defined as:-
 
T = 1.4 R4 C2

As the timing is crucialthe capacitor should have a tolerance of 5% or better and the power supply should be regulated. To allow for tolerance in components a 4k7 preset resistor is wired in series with R4. This adjustment allows R4 to be 15k to 19.7K creating output pulses of 21us and 27.58 us. As frequency is the reciprocal of periodic time then the oscillator adjustment is from 36.2Khz to 47KHz, allowing fine tuning for almost any appliance.

The final output stage uses a BC337 transistor in emitter follower. The output pulse will not be inverted, and the current through the IR photo emitters is around 30 mA dc. This is of course an average value, measured with a digital multimeter. The red led as always, is a visible indication that an input signal has been received. The circuit may be modified to use a fixed resistor in the timing chain as shown below. In this example a voltage regulator is also recommended to prevent changes in supply voltage altering the output pulse.


Setup and Testing:
Remove LED 2 and 3 and apply power. With no input signal LED 1 should be off. Press a button on a remote control in the same room as the circuit. LED 1 should flicker. If all is well, connect LEDs 2 and 3 and point them in the direction of the appliance (TV or VCR etc). The cable to the LEDs can exceed 100 metres if necessary, ordinary loudspeaker cable or bell wire is suitable. Set preset PR1 midway initially, it should work for all equipment. Most equipment is tolerant to within 5% so if you have for example a video that works at 42kHz and a TV that works at 38Kz tuning the modulation to 40KHz should allow both devices to operate. Any troublesome equipment, for example an Echostar receiver repeatedly press abutton on the handset while tuning PR1, you will find that it operates at some point. One IR LED may be used in place of LED2 & 3, but if there are two appliance in the same room, but in different locations, LED 2 can be aimed at a video, while LED3 aimed at a CD player for example. Below is how I discretely placed a photo emitter and plastered it directly into the wall:


Modifications:
An alternative output configuration is shown below. This uses a MOSFET to replace the original BC337 transistor. My thanks to Pete Griffiths for this modification and diagram.


Compatability:
If you make either the Mark 3 or 4 circuit please let me know if it works and the make and model of your remote control. I will add this to the database of compatible handsets below:-

Aiwa RC-ZVR01
Denon RC 554
Denon RC 921
Denon RC 924
Echostar T22605AA-00 * troublesome required careful tuning of PR1 to work
Kameleon One for all remote (URC-8060) Goodmans 97P1R2CPA1
Grundig SRC2
JVC LP20878-002
Matsui 28WN04
Mitsubishi 290P103A10
Mitsubishi EUR647003
NAD HTR2 (multi remote)
One for All 9910
Panasonic EUR511200
Philips RC6512
Pioneer AXD7323
Pioneer DV444
Pioneer VXX2801
Radioshack 1995
Saisho VR3300X
Sony RM-533
Sony RM-887
Sony RMT-V240
Sony RM-S325
Sony RM-DX50
Sony RM-U215
Sony RM-839
Sony RM-SCEX1
Sony RM-S336
Sony RM-D43M
Sony VCR
Technics EUR64713
Read More..